Tips for Breathing Life into your Productions
Posted by James Cullen on
Do you ever find your productions are lacking that special quality that elevates them from an amateur track to a pro sounding mix? They may sound flat or dead to your ears, or you may just want to inject a little more pizzazz into the mix. If this sounds like a familiar situation, then stick around, because you need some electronic production tips for breathing life into your tunes!

The subtleties that go with creating electronic music that doesn’t sound rigid and robotic (unless of course you want it to sound that way) are a dark art, and it was one of the criticisms levelled at synthesisers and electronic music in general when it first became popular. If you listen to any electronic music from the 80s, it all sounds very of its time.
Since then, however, the advances in music production technology have allowed for things like multisampling, advanced automation techniques, humanisation and more. These are all the tools in your arsenal to make your music sound like a living orchestration instead of a dead collection of rigid parts.
So, today with Top Music Arts, we are going to take you through 15 steps you can take in your productions to add more life and character. Let’s jump in!
1) Chord Inversions.
If you’re not familiar with music theory, then brushing up on it is a good idea regardless of what music you produce. But for this example, we’re going to be talking about chord inversions.
A chord inversion is -for the untrained producer- just a way of differently voicing a chord, and it gives a different character to the sound, while still keeping the same harmonic base.
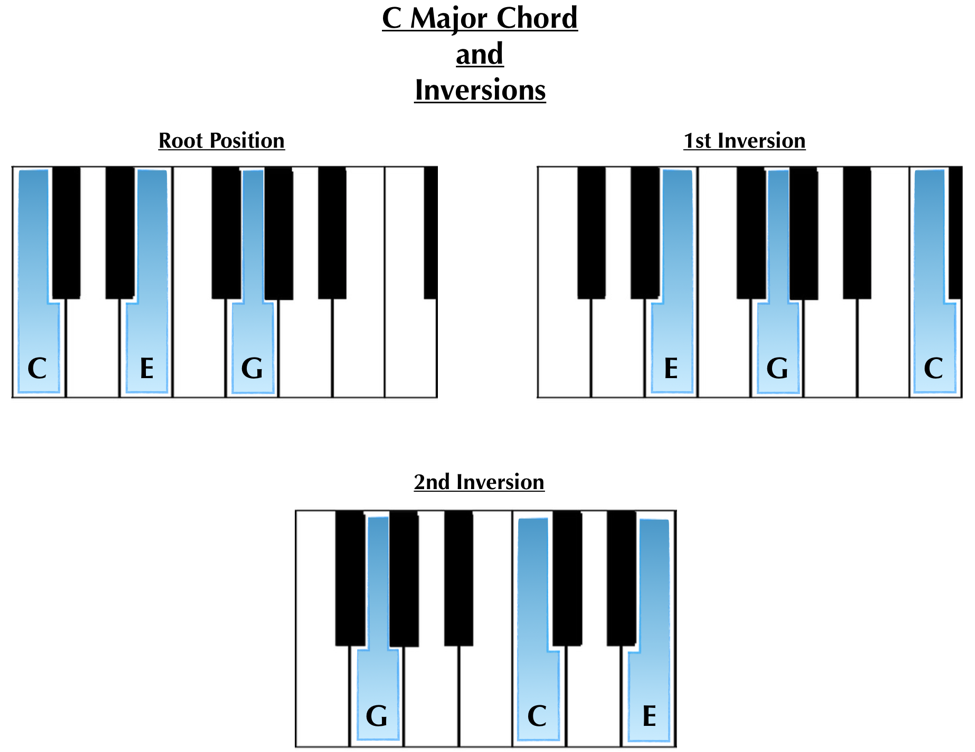
So, if you have a MIDI keyboard in front of you, play a C Major chord.
C3 E3 G3.
Now, transpose the root C note to C4, so the voicing becomes E3 G3 C4. Hear how it subtly changes the tone of the chord, while still fundamentally being the same notes?
When incorporating this technique into chord progressions, you can create some really nice sounding results. You can even experiment with chord voicing across different instrument parts. So if the above example was a synth pad playing the inverted C Major chord, you could have a bass part playing a low C, so over the two parts you would have:
Bass: C1
Synth: E3 G3 C4
Try it out!
2) Play your rhythm parts!
Creating electronic music in Ableton can often feel like quite an unmusical experience. If you’re drawing in your chords, leads and drum patterns, there can often be a certain level of detachment from the feel of the music.
Compare how it feels to play a song together with a band of living breathing musicians, versus pressing play in Ableton and hearing your drawn in drum, synth and other instrument parts.
There’s a reason humanisation is a term in electronic music production.

So, to combat this, a great way of working is by physically playing in your rhyhtm parts. Whether it’s a bass line on a keyboard, or drum parts on a drum pad such as Ableton Push, you can inject life into your music right there by having the human feel of the part. After all, even the best drummers or bass players can’t play perfectly in sync every time.
Many genres even make use of ‘swung’ rhythms, where the instruments or drums play slightly ahead of or slightly after the beat, and you can’t always get this result with drawing something perfectly quantised. The beauty of playing in some MIDI notes is that you can correct them afterwards, but you still get that invaluable human feel to the music!
3) Learn how to use frequencies!

The psycho-acoustic effects of different frequencies are a very real phenomenon. The perceived mood or level of excitement in a track has a direct relationship with what frequencies are currently playing in the music.
Consider how an audience reacts when the low end is dropped out of a track. It creates a building sense of anticipation right? Similarly, if all that’s playing is low end, kick and bass, for example, your audience will zero in on the rhythm of the music.
Learning how different frequencies affect the perceived mood in your audience is a great tool when sculpting your music. Mix up your arrangements by adding or removing certain frequency bands to create specific moods in your music!
4) Use counterpoint to your advantage.
Counterpoint is a technique of combining several lines of melody within your music to create an overall more pleasing soundscape. If you listen to some of your favourite tracks, you may be surprised by how simple the individual melodies are when you dissect it. But the relationship between the parts is what the listener hears as a whole musical phrase.
Counterpoint is the interplay between these melodies; the blending of separate parts. The individual melodies combining together to create something which sounds more pleasing as a whole phrase. The individual melody structures sound pleasing on their own, but the harmonic and rhythmic relationship between them adds to a greater whole.
Try it out with your own productions and the results will speak for themselves!
5) Find the perfect BPM.
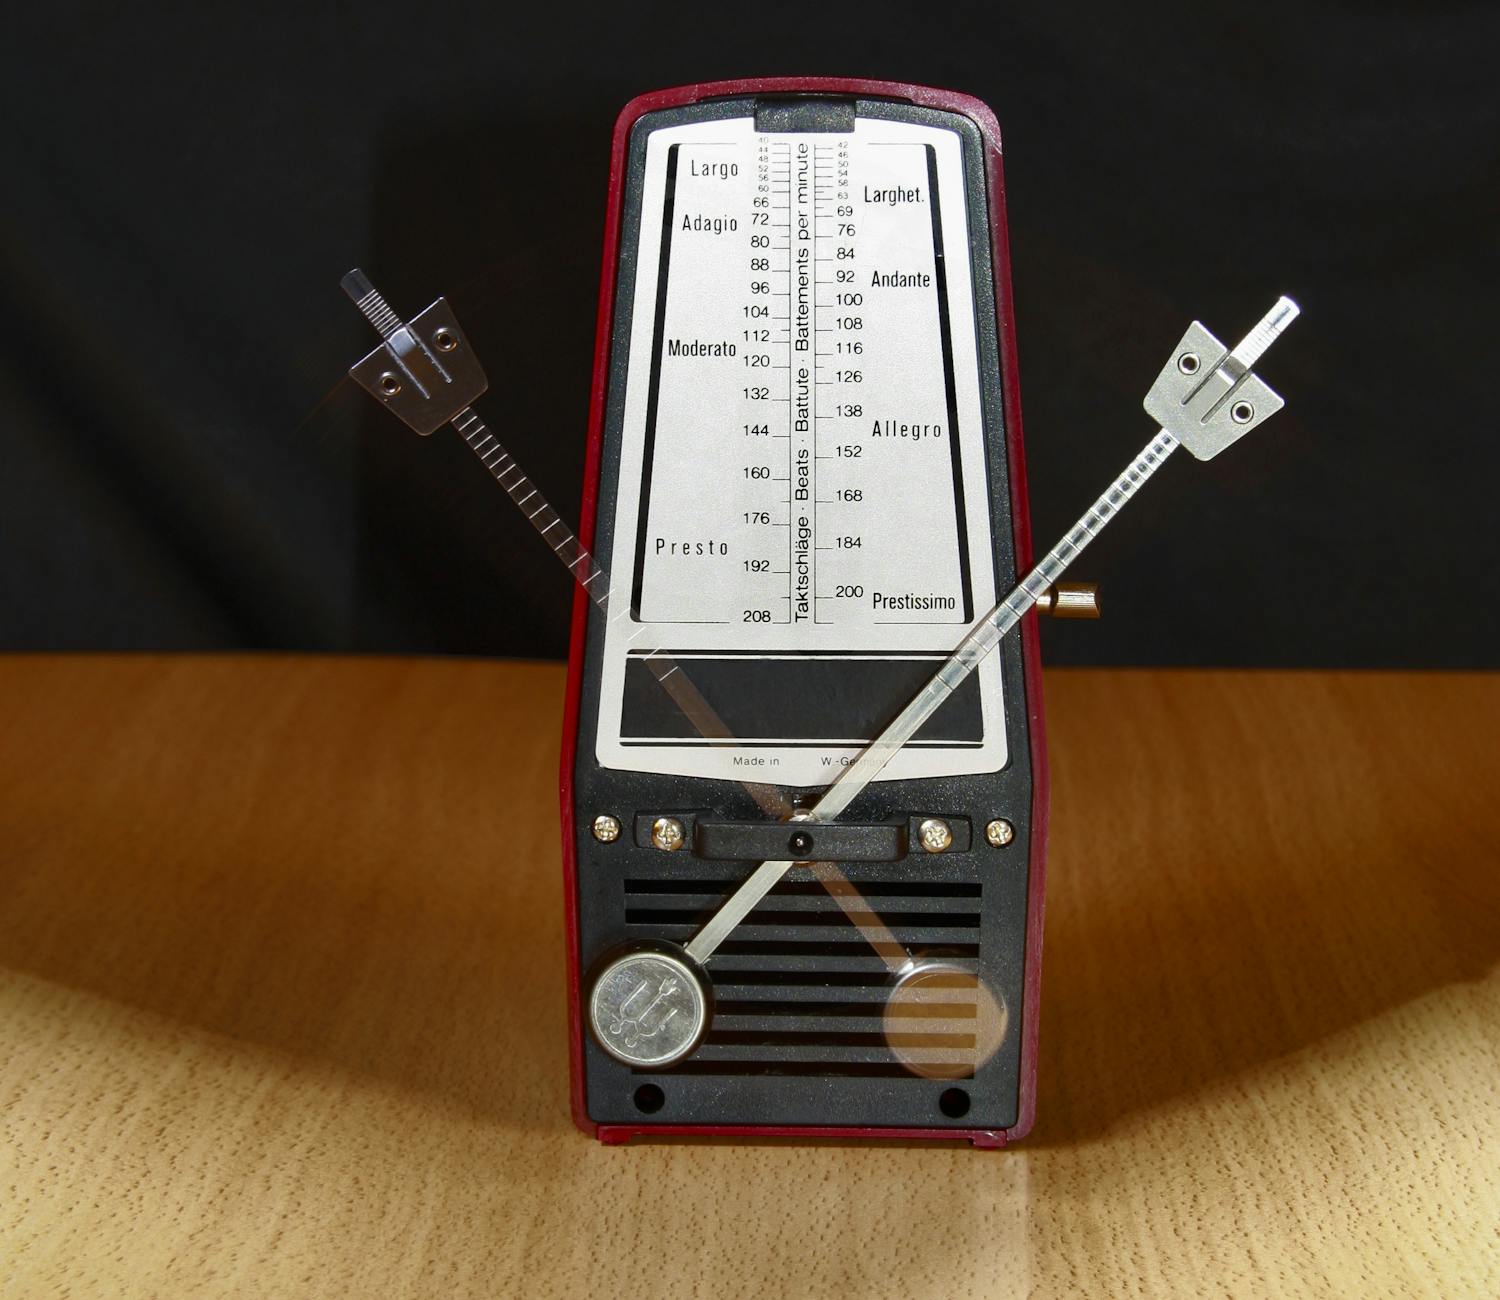
This may sound like an odd tip, but for many producers -specifically if you’re producing within a certain genre- it’s easy to fall into a default BPM tempo and not give it any more thought.
However, a good trick to finding your groove with a track is experimenting with how it sounds at various tempos. Once you have a workable loop of 8 or 16 bars, try playing it through a few times at different tempos. You may find that at certain speeds the music just seems to undergo an almost imperceptible change, and it just feels right.
Doing this is a great way to make sure you don’t miss out on a track’s potential, because I’m of the firm belief that some pieces of music have a perfect BPM at which they just pop compared to being played at other speeds.
Tip: Make sure any audio or samples you’re using are warped to the project’s BPM before you change it!
6) Velocity
The best thing you can do for making your instrument parts sound less robotic is to play with the velocity. When you draw in notes on Ableton’s piano roll, they automatically are all at the same velocity, unless you manually change it.

When you record yourself playing it in, however, notice the lighter and darker colour shades the notes take. This is a visual representation of their velocity, and you can manually change this too.
No human ever plays their notes at the exact same volume each time, so adjusting velocity works to make things sound more natural. You can also do this for drum parts to create different levels of emphasis.
7) Modulation
Similar to the point above, Modulation is the ability to control various parameters within Ableton, whether it’s FX or individual controls on a synth, for example. It isn’t enough to just send your instruments to a reverb or delay channel and call it a day, because that will lead to a less than professional end result.
Instead, consider the relationship that each instrument part of your track needs to have with its FX, taking into account how removing and adding the FX can affect the overall sound and feel of the track.
Use automation to vary how much of an effect is applied, such as adjusting the amount of reverb over a 16 bar period to gradually change the spatial element of the track.
You can also apply modulation and automation to individual parameters on any of Ableton’s synths or effects units. Simply select from the drop down menu on your track which parameter you want to automate, and then the automation lane will change to represent that.
The sky really is the limit when it comes to automating parameters in various Live devices or synths, so get creative and experiment with subtle changes or more obvious ones!
8) Add ‘Finishing touches’ to your tracks
So if you think you’ve finished a track, leave it for a few days and then go back to it with fresh ears. You can then get some distance from the creation of the music, and come to it with some fresh ears.
It’s easy to create music that’s quite repetitive when you’re focusing on creating an entire song, so from this new perspective you can focus on areas you might have overlooked. Change up the drum pattern at the end of the verse for a bit of interest, remove a bar of the chords to create a space before a breakdown. Add ‘one time’ events; FX or percussive hits that break the monotony of your arrangement.
Remember that you can get so excited adding loads of elements to a track that it can end up sounding cluttered. Try muting certain parts in certain sections to see if you really need that third synth line. After all, how often does it hold true that Less is More?
Keeping your listener on their toes is paramount in avoiding boredom. You want them to marvel at the complexity of your arrangements, not have heard everything the track has to offer within the first 16 bar loop of music.
Get creative with the finer details!
9) Learn the uses of Loud / Quiet dynamics in your mix.

When you’re building your arrangement, you’re inevitably going to be dealing with layers of instruments and drum parts, all of which interact with each other in different ways. At the mixing stage, you’ll get to know the intimacies of these interactions in minute detail, and this is where loud / quiet dynamics comes in.
You can create some really interesting effects by subverting the listener’s expectations when it comes to how loud or quiet parts are. You can have parts that are recorded or played very quietly sitting quite loud in the mix, and this will create a sense of intimacy with the listeners. For example, imagine recording some lyrics whispered and then having this whisper sit loudly at the forefront of your mix. It would sound extremely intimate, like those ASMR videos on YouTube.
Alternatively, you can have something recorded in extremely loudly, and then have this sit quiet in your mix for the opposite effect. Loud shouting mixed quietly creates a sense of distance in the mix, adding layers and space.
But you don’t just have to do this with vocals, play around with instruments and synths or drum hits, and see what kind of interesting effects you can create!
10) Start at the end.

Think about how your track is going to sound as a finished arrangement, and aim to get this done first. The benefit here is that if you start with an idea of how it’s going to sound at the end or the height of its intensity, you can figure out exactly how to build up to that moment.
It also gives your production some focus, as you know exactly what you’re working towards! The trick is to build an arrangement that builds up and anticipates the final structure in a concise way.
11) If it doesn’t work, bin it.

You need to learn to be able to recognise when an idea isn’t working out and ditch it straight away. This will ensure you don’t waste time on it, and you won’t end up bogged down or frustrated.
It keeps your mind fresh and focused, and trains you to create music in a more efficient way.
12) Listen outside your genre.
If you’re solely producing one genre of music, it’s easy to fall into the habit of only listening to that same genre for your influences. While there is merit in this - how else will you learn the go to production techniques? - it can also mean you’re stuck within a certain set of guidelines.
Listening to music outside of your preferred genre is a great way to break this.
It can give you ideas for new production techniques to try in your own music that will set it apart from the rest of the genre. This is essential if you’re looking to create that breakout track that will turn heads, instead of something that just falls under all of the predictable tropes of a certain style of music.
14) Collaborate!
Whether it’s by physically getting another producer into your studio, or collaborating over the internet, the value of having another producer’s ears contributing your work can’t be overstated.

Many of us have our own signature way of producing music, even if we aren’t necessarily aware of it. Maybe you’re really good with reverb, but you only have a working knowledge of EQ, for example. When you combine the skills of two producers, however, this signature way of producing is multiplied.
Fresh ears listening to your music, fresh techniques and fresh ideas are all benefits of collaboration, Having another producer can help you inject ideas into the music that you never would have thought of, and it’s a really great way of breathing life into your productions. Often if you spend too long on a track it can get bogged down and sound stale, so having someone else’s point of view is invaluable.
15) Don’t turn your nose up at loops.
Often if you’re programming in drum beats they can sound super stiff and quantised. While this isn’t necessarily a bad thing, and may actually be the exact sound you’re looking for, it can sometimes leave your beats sounding a little robotic.
A great trick to counter this is to drop in some percussion loops with a solid groove to them. You can do this in a number of ways, whether it’s using the loop to underpin your kick and snare, or blending it more subtly behind other percussion elements. The point here, though, is that the groove of a percussion loop can help drag your drums out of that stiff and robotic sound and place them in a more organic register.
Another great bonus from doing this is that it can often lead to more creative ideas for the percussion parts in your track, because it’s all too easy to fall into the trap of simply creating an 8 bar drum phrase and copy and pasting it!
So, there you have 15 Top Tips to help you inject more life into your electronic music productions. We all know how tough it can be to make electronic music sound humanised, so hopefully with these techniques, you’ll be on the way to creating better music!
Thanks for checking in with us here at Top Music Arts, and be sure to check out the rest of our site while you’re here, you never know what useful tips or tricks you might find!