Ableton Simpler vs Sampler
Posted by James Cullen on
Ableton Live Suite comes with two built in Samplers. There's the creatively named Sampler and its younger, less experienced sibling named Simpler.
In this article with Top Music Arts, we will take a look at both, what their key functions are, how they differ, and what functions they share.
But before we start...
What is Sampling?
Sampling is broadly defined as the use of all or part of another recording within a musical composition. This could be as basic as dragging an audio sample of some dialogue from a movie into a track (see Kanye West & Jay Z - N****s in Paris) or it could be something more complex; creating an instrument out of a piece of sampled audio using a dedicated Sampler plug in.
Sampling's roots are in musique concrète, which was an experimental genre developed in the 1940s which was comprised of manipulating recordings on Tape. Since then, the term Sampling was introduced in the 1970s by the creators of the largely influential Fairlight CMI sampler.
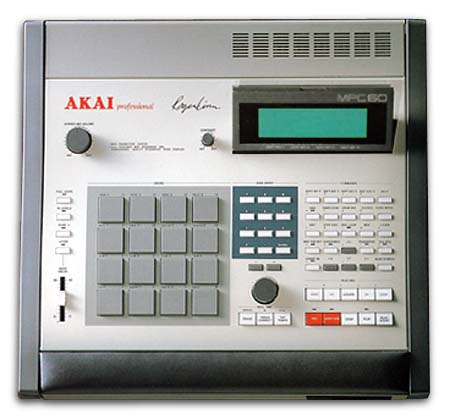
Sampling then went on to become a staple of pop music through the 1980s, and with the release of the Akai MPC in 1988, Sampling was made available to a much more extensive audience.
A closer look.
So, when you’re thinking of using an audio file in your productions to add a bit of extra flair, or even to create a melody, there are plenty of ways you can get great results just by dragging in the audio file onto an Audio Channel and applying FX from there. We’ve explored previously how Live has some pretty cool audio editing features, but why should you use a sampler?
Chances are, within the whole of Live, there are loads of features and functions hiding under the surface of your knowledge. You probably get your results in your productions by using a percentage of Live’s entire catalogue of features, so let’s explore some of the ones you may not be using within Simpler and Sampler.
Simpler

Simpler is Live’s basic version of a Sampling plug in. It allows you to create an instrument out of an audio file of your choice, and edit the parameters of that instrument to really shape the sound. You have Envelope, Filter, LFO, Volume and Pitch controls to work with, so there’s a huge array of possibilities when creating your instrument.
Where Simpler varies from a more traditional sampling instrument, is in its inclusion of some of the functionality from Ableton Clips. You can use the Warp feature to make sure samples play back at the exact same tempo as your set regardless of what note is triggered. This feature can be really useful if you’re using Simpler to just trigger a sample that needs to be in time.
When you open it up, Simpler’s interface gives you two areas of control. The Sample and Control tabs. If you don’t want to swap between the two, you can hit the Disclosure Triangle once you’ve loaded a sample, and it will load the Sample window in a larger expanded screen, and the Control window remains in the Device View.
So what can you do in these two areas?
Sample Window
This window gives you all the detailed controls you need to edit the sample itself. Samples can be dragged into Simpler from Live’s browser, as well Session or Arrangement View as a clip.
Note: if you’re dragging a clip into Simpler, it will only use the section selected by the clips start/end or loop markers. So bear this in mind.
Simplers main area that will dictate the sound and treatment of your sample is the mode switch. This is located on the left of the sample view when not in the expanded mode (it is then in the bottom left of the expanded screen) and it features three modes. Classic, 1 Shot and Slice.
- Classic Mode - this is Simpler’s default mode, it’s polyphonic by default, and is best when used for creating a melodic or harmonic instrument using a pitched sample. It has a complete ADSR envelope so you can edit exactly how your sample is triggered, as well as looping so the sample will sustain as long as a note is held down.
- One-Shot Mode - as the name suggests, this is for mono playback, and is best suited to drum hit or sampled phrases. It has a simplified envelope and doesn’t support looping. Worth noting is that by default, the whole sample plays back when a note is pressed, regardless of how long the note is actually held.
- Slice Mode - non-destructively slices the sample so you can play back individual slices chromatically. This allows you to create and move slices manually, or choose from a number of different options for how slices can be automatically created. This mode is ideal for working with rhythmic drum breaks.
Bear in mind that this is only a brief summary of the functions of each of the three modes, and Live’s Manual is a great resource for really getting in depth into the functions and controls of each mode.
The Sample window features Live’s Warp controls, including all of Warp options available in Audio Clip editing. So if you’re familiar with warping Audio Clips in Live, you’ll be very comfortable working on the same area within Simpler.
There are options for behaving like a ‘conventional’ sampler, when Warp is off, Simpler plays back the sample at different speeds based on the different pitches triggered by the keyboard or piano roll. Alternately, you can select to Warp your sample to stay in sync with the song’s tempo, or to Warp within a specified number of beats or bars.
Controls Window

Simplers Controls Window gives you more detailed controls over the Filter, LFO and Envelope. This allows you to further shape your sound through synthesis parameters, rather than tweaking the sample itself.
Simpler’s filter section includes a number of different filter types. There are high and low pass, bandpass, notch and a unique Morph filter. Each one has a 12 and 24dB slope, as well as including a variety of analog modeled emulations of circuit behaviours found in classic analog synthesisers.
Simpler has three envelope sections in the form of a classic ADSR envelope. These are, Amplitude, Filter Frequency and Pitch Modulation. These can all be toggled and adjusted to shape the dynamic response of your sample. Experiment with these various controls to see how they affect your sample’s sound.
Finally, the LFO section offers various waveforms with which you can shape the sound. You have an attack control, to determine how quickly the LFO reaches its full intensity, as well as Retrigger, Pitch, Pan and Filter controls. Simpler’s LFO runs between 0.01 and 30Hs, or it can sync to divisions of your Live project’s tempo.
There are a number of other modifiable parameters within Simpler, but we don’t want to get too bogged down in the specifics here. Check out more in depth looks through tutorials, or as always, in Live’s manual.
Sampler

Sampler is Live’s multisampling instrument, using the full power of Live’s audio engine to give you complete control over the sample or indeed samples you drag into it. Capable of handling large instrument libraries and most common library formats, Sampler truly is a formidable piece of software. It’s worth noting that Sampler is only included with Live 10 Suite, or as a standalone purchase from Ableton’s online store.
While Live’s interface is very skilled at tricking the user into thinking they’re dealing with something simple, don’t be fooled. There are a host of detailed controls within Sampler that make it’s companion Simpler seem like a child’s toy in comparison. You have an extensive internal modulation system, allowing editing of almost every aspect of the sound.
Oh and if you didn’t get the memo; it’s a multisampling instrument, so let’s take a look at what that actually means.
Multisampling in practice
Multisampling as a concept is a technique used (as Live’s Manual puts it) “to accurately capture the complexity of instruments that produce dynamic timbral changes.”
What does that mean?
Consider a piano. If you were to use Simpler, and dragged in a C3 note of a piano, sure, it could transpose the note across all octaves, and for all intents and purposes you’d technically have a piano sampled instrument. But you’d be able to hear it was created from one sample.
In Sampler, on the other hand, we get to take advantage of multisampling, which -when applied to our piano example - would mean we have sampled the piano at multiple points within its sonic range. This means it would be recorded at different pitches and velocities. It would be recorded softly, loudly, and everything in between. The final result -or multisample- is a collection of all of these individually recorded sample files, to create a much more lifelike recreation of the instrument, breathing much more of its true sonic qualities into the recording. You may have several sample files of each individual piano key in a multisampled piano instrument, to capture the full timbral complexity of the instrument.
While this may sound daunting , especially in the context of creating your own instruments, Sampler is designed to be as complex or simple as you like. Take some of the presets for example; they load onto your track with only the condensed 8 knob view allowing control over key predefined parameters, whereas others allow you to take a headlong dive into the complex controls, should you so desire.
Let's take a look at a few of those options.
Sampler’s Tabs


A great way to familiarise yourself with the controls Sampler has to offer, is to take a look across the top title bar. There you will see a range of tabs showing the various control options available to you.
These are:
- Zone
- Sample
- Pitch/Osc
- Filter/Global
- Modulation
- MIDI
Don’t let an instrument with six tabs worth of information put you off; each tab has one or more LEDs to indicate if there is modulation information being controlled by that particular area. So if you’re unsure of what’s being controlled where, these are a good way to find out.
The Zone tab is fairly straightforward; it allows you to edit and map any number of samples across three ranges; the Key Zone, Velocity Zone and Sample Select Editors. Samples used are shown on the left, with the keyboard across the top, and the right hand pane showing where samples are mapped to.
The main features of this zone are the ability to map samples to areas on the Keyboard, a range of Velocities and the Sample Select Zone, which is a rabbit hole to go down, enter at your own risk!
The Sample Tab behaves in much the same way as Simpler’s does, allowing controls over how the selected sample behaves within Samplers environment. There are a multitude of controls to look over in this section, all of which affect the overall sound of the sample.
The Pitch / Osc Tab allows detailed control over the Modulation Oscillator (Osc) and the Pitch Envelope. The Modulation Oscillator performs frequency or amplitude modulation on the multisample, with 21 waveforms and its own loopable amplitude envelope. The Pitch Envelope modulates the samples pitch over time, as well as that of the Modulation Oscillator.
The Filter/Global tab offers a detailed polyphonic filter with an optional waveshaper, with a variety of filter types. This is much the same as the Filter in Simpler. There is also a Global Volume Envelope in this tab, which defines the articulation of Sampler’s sound output with a standard ASDR set of parameters.
Sampler’s Modulation Tab offers a loopable envelope, as well as three LFOs which can all modulate multiple areas of Sampler’s controls, including themselves. As with Simpler’s LFO, these can be free running, or can sync to your Live projects Tempo.
Finally, the MIDI tab is designed to turn Sampler into a performance instrument with dynamic controls. You can map various MIDI controllers, such as Key, Velocity, Release Velocity, Aftertouch, Modulation Wheel, Foot Controller and Pitch Bend to two destinations per controllers, with dedicated controls (Amount A or B) to dictate how much each destination (A or B) is affected.
Comparing the two.
So, we’ve gone over a summary of both Simpler and Sampler that lies somewhere between basic and in depth. Hopefully you’ve been able to figure out the functions of each, and what features they share. With a huge selection of presets available for each instrument, there’s plenty to sink your teeth into if you’re not in the business of creating your own detailed sampled instruments.
If you’re looking to use an audio sample in your production and only need limited controls over shaping that sound, Simpler may be the better choice, but if you’re wanting to get your hands dirty and really dive into moulding and shaping your sound so it’s almost unrecognisable from the source, or if you want to use a sophisticated multisampling environment with varying degrees of velocity and multiple source samples, Sampler is the way to go.
Bottom line is, there are a variety of scenarios where using one over the other may not be entirely necessary, but certain scenarios definitely call for a specific set of controls.
We hope you’ve gotten some use out of this comparison of Ableton’s two sampling instruments, and be sure to stay tuned for more articles, tutorials and templates to help you further your productions.
Bonus Tip: create an instrument out of any sound.
Tired of your regular synth presets, or just looking to inject something totally fresh into your tracks? With the power of a sampler, you can create an instrument out of anything.
Here’s how to do it.
Load up a blank instance of Simpler, and bring in any sample you want. (It has to be something pitched in order to work; a glass clinking, a whistle, your girlfriend singing…)
Once you’ve imported your sample into Simpler, you will be able to select the Start and End values. Drag these to isolate a short instance of the sample where you get a good resonance of the tonality and pitch of the sound. This is going to be the base of your instrument. Make sure to set it to loop so you aren’t just getting a one shot of the sound!
Play around with other parameters within Simpler to create any sort of sound you want, and apply FX as generously or as sparingly as you’d like. It could be a pad, lead, or any type of synth sound.
Et Voila! You’ve created an instrument out of a totally un-musical sound!